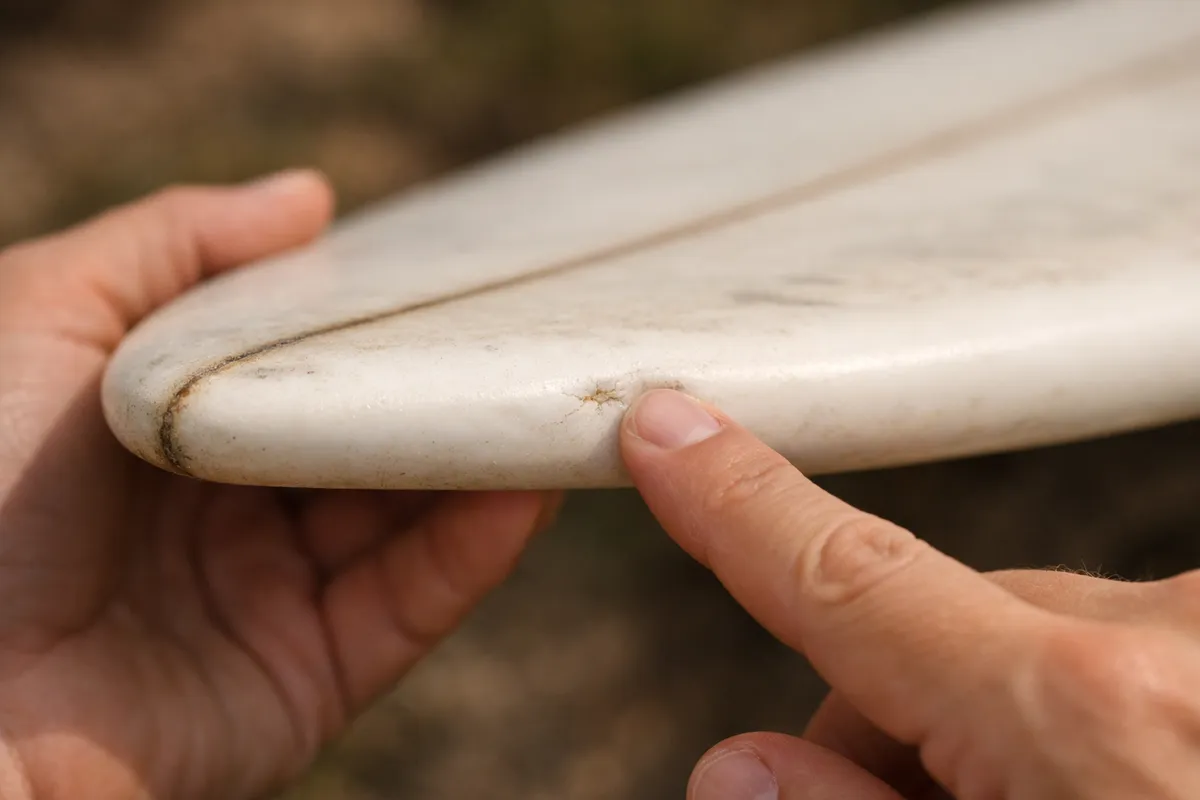
It happens to every surfer: you drop the board in the parking lot, bump it on a rock, or take a hit from someone else's board in the water. A chip, a crack, a dent — a "ding." It looks bad, but most dings are simple to repair yourself.
The important thing is to fix them quickly. An open ding lets water into the foam core, which makes the board heavy, causes delamination, and eventually ruins it. A sealed ding is just cosmetic.
Assess the damage
Minor ding (fix yourself)
- Small chip or crack in the fiberglass (coin-sized or smaller)
- No visible foam damage — just the outer shell
- Shallow dent that hasn't broken through the glass
Moderate ding (fix yourself with care)
- Crack that exposes the foam core underneath
- Chunk of fiberglass missing (golf-ball-sized or smaller)
- Fin box crack (if the box is still solid)
Major damage (take to a professional)
- Crease across the board (structural flex damage)
- Large section of fiberglass delaminated or missing
- Board is buckled or snapped
- Fin box torn out
A professional ding repair costs $30–100 depending on the damage. Worth it for structural issues. But for minor and moderate dings, DIY saves money and gets you back in the water faster.
The emergency seal
If you notice a ding before or during a session and want to keep surfing:
- Dry the area. Pat it with a towel.
- Apply a temporary seal. Options: solar resin (Solarez/Ding All), duct tape, or even candle wax in a pinch.
- Keep surfing. The goal is to prevent water entry until you can do a proper repair.
Solar resin (Solarez) is the best emergency tool. Squeeze it onto the ding, smooth it with a finger, and hold the board in direct sunlight for 3–5 minutes. It cures hard and waterproof. A tube costs $8–12 and fits in a glove box.
The proper DIY repair
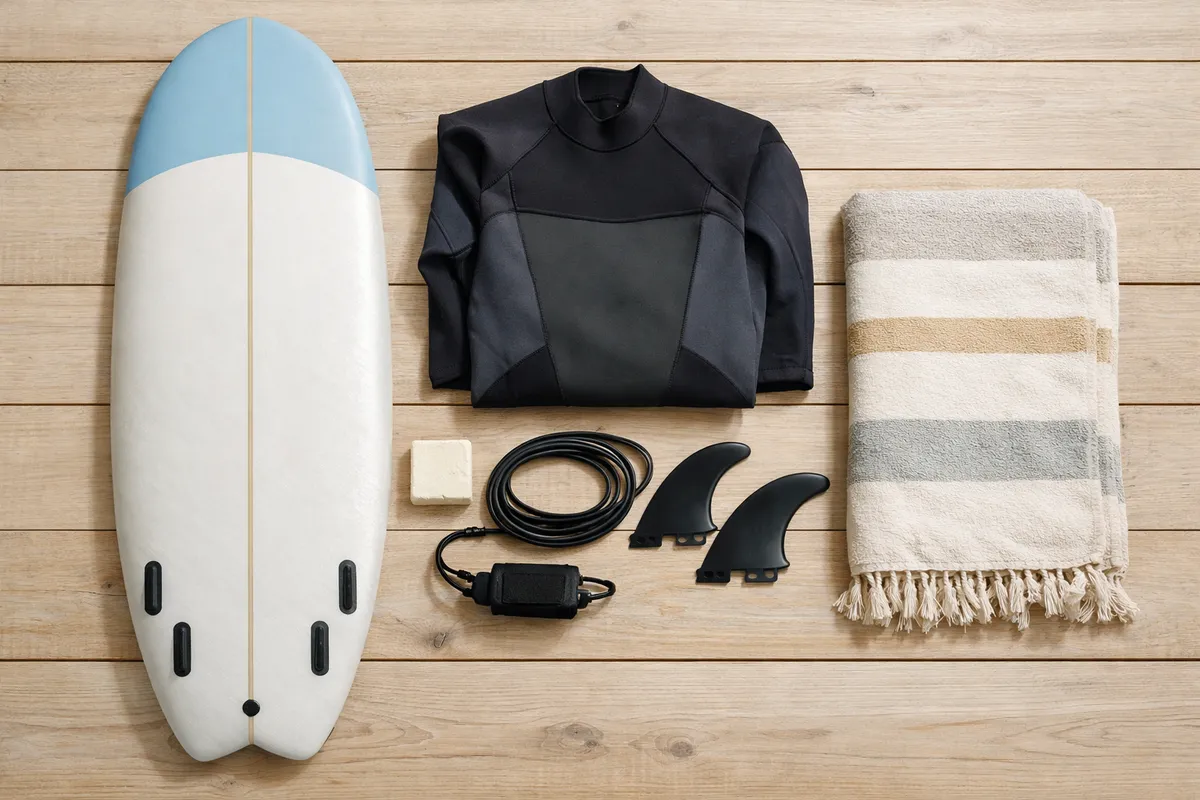
What you need
- Solarez or equivalent UV-cure resin ($8–15 per tube) — or traditional polyester/epoxy resin ($15–25 per kit)
- Sandpaper — 100 grit (rough) and 220 grit (fine)
- Masking tape
- A razor blade or craft knife
- Fiberglass cloth (only for larger repairs where fiberglass is missing)
Most surf shops sell pre-packaged ding repair kits ($15–25) that include everything. Buy one and keep it in your car.
Important: match the resin to your board
- Polyester resin (PU boards) — traditional fiberglass boards with a polyurethane foam core. Most boards fall into this category.
- Epoxy resin (EPS/epoxy boards) — lighter, newer-construction boards. Often labeled "epoxy" on the board or by the shaper.
Using polyester resin on an epoxy board can melt the foam. Check your board's construction before buying resin. When in doubt, epoxy resin works on both types — it's the safer choice.
Step-by-step repair
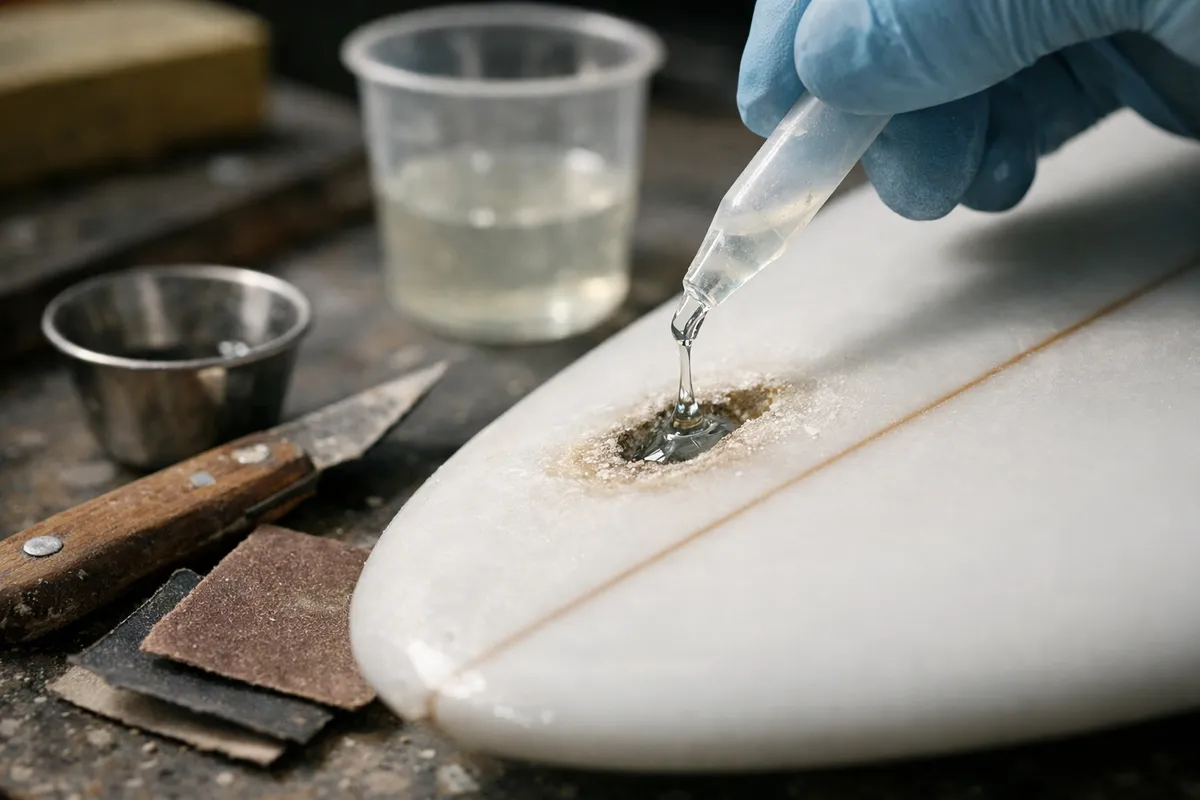
- Dry the board completely. If water got into the foam, leave the board in the sun for a day with the ding facing up. Water trapped inside causes bubbling during repair.
- Clean the ding area. Remove any loose fiberglass chips, sand, or wax around the ding. Use the razor blade to trim ragged edges.
- Sand around the ding. Use 100-grit sandpaper to rough up the area around the ding (about 1 cm border). This helps the resin bond.
- Mask off the area. Put masking tape around the repair zone to keep resin from spreading onto clean fiberglass.
- Apply resin. Squeeze UV-cure resin into the ding, filling it slightly above the surface (it shrinks as it cures). For larger dings with missing fiberglass, lay a small piece of fiberglass cloth over the area first, then saturate with resin.
- Cure. For UV resin: hold in direct sunlight for 5–10 minutes until hard. For traditional resin: follow the kit's instructions for catalyst mixing and cure time (usually 15–30 minutes).
- Sand smooth. Once fully cured, sand the repair flush with the board surface. Start with 100 grit to take down high spots, finish with 220 grit for smoothness.
- Remove tape. Peel the masking tape. Run your hand over the repair — it should feel smooth and level with the surrounding board.
Rail dings
Dings on the rails (edges) are the most common and the most important to fix — rails are where water enters fastest because they're always submerged.
Repair the same way, but build up resin in thin layers rather than one thick application. Rails have a curve, so thick resin drips before it cures. Two thin layers, cured separately, give a cleaner result.
Prevention
- Use a board bag for transport. Even a thin day bag prevents parking lot dings.
- Don't stack boards. Laying boards on top of each other causes pressure dings.
- Be careful in the water. Most dings happen during collisions — maintain distance from other surfers.
- Rinse after every session. Salt water degrades exposed foam. Even a quick rinse helps.
When to give up and go pro
Take it to a professional ding repair shop if:
- The damage is structural (board flexes where it shouldn't)
- You're unsure about the board's construction (PU vs epoxy)
- The repair area is larger than your hand
- You've tried a DIY repair and it didn't hold
Most surf towns have at least one ding repair specialist. Turnaround is typically 2–5 days for standard repairs.