Surf photography is one of the most rewarding — and most challenging — forms of action photography. The subject is moving fast, the light is constantly changing, there's salt spray on everything, and the best angle is usually from inside the water where your camera doesn't want to be.
But here's the secret: you can take excellent surf photos from the beach with equipment you already own. You don't need a water housing, a jet ski, or a $3000 telephoto lens to capture memorable shots. You need good timing, the right position, and a few basic techniques.
Equipment
Phone (everyone has one)
Modern phones (iPhone 15+, Samsung S24+, Pixel 8+) have zoom lenses that work surprisingly well for surf photography in the right conditions:
- Best for: Beginners surfing close to shore (within 30 meters), behind-the-scenes camp shots, beach portraits, sunset silhouettes
- Limitations: Digital zoom degrades quickly past 5x. Struggles with fast action at distance. Can't freeze motion as well as a dedicated camera.
- Tips: Use burst mode (hold the shutter button). Shoot at the highest resolution. Clean the lens — salt spray kills sharpness.
Mirrorless or DSLR with telephoto
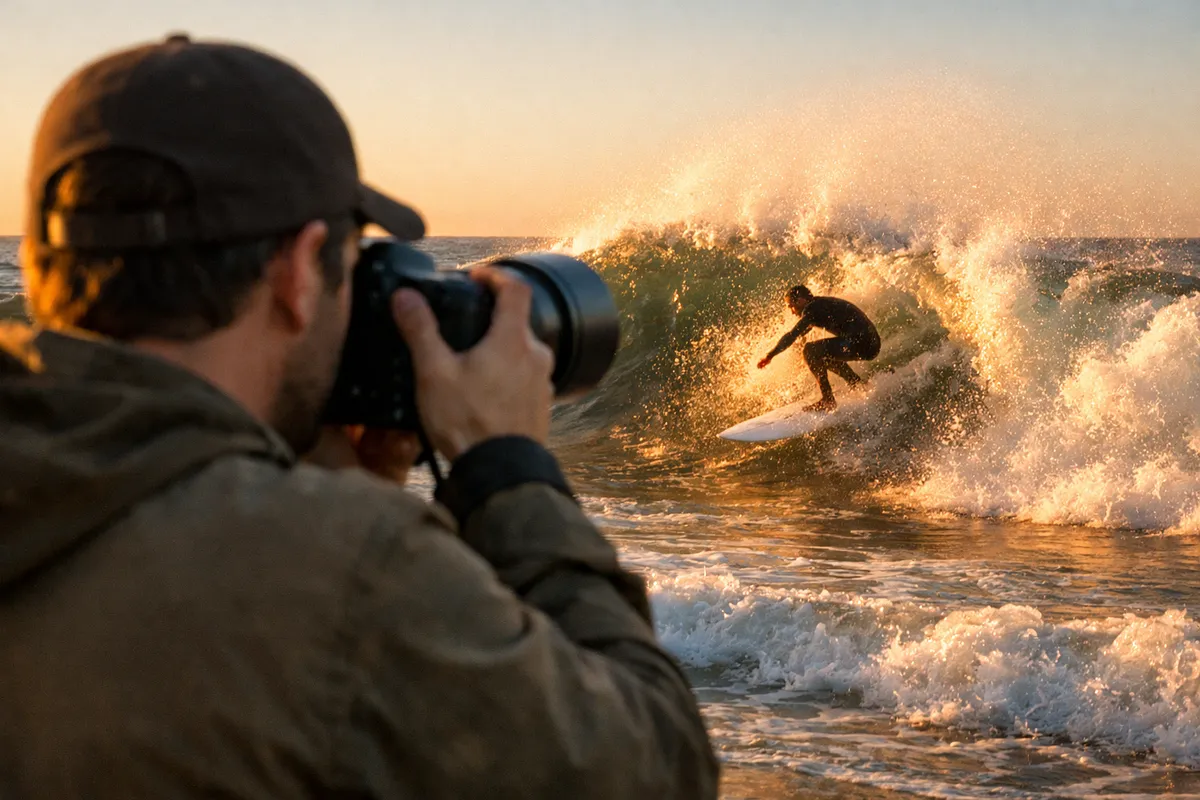
For serious from-the-beach surf photography, you need reach — a 200mm lens minimum, ideally 300–400mm.
- Budget option: A used Canon or Nikon DSLR ($300–500) with a 70–300mm lens ($200–400). Total: $500–900. This setup produces professional-looking surf photos.
- Better option: A mirrorless camera (Sony A6400, Canon R10, Fuji X-T30) with a 70–300mm or 100–400mm lens. Better autofocus, lighter, faster burst rates.
GoPro / action camera
Great for in-water POV footage and close-range action. Mount it on the nose of a board (with a mount) or hold it in the water. Not great for traditional surf photography from the beach — too wide-angle.
From-the-beach technique
Position
Where you stand determines the quality of the shot more than any camera setting:
- Angle to the wave: Stand at a 30–45 degree angle to the breaking wave, not directly in front. This gives the photo depth and shows the wave face.
- Elevation: Higher is usually better. A cliff, a jetty, or even standing on a rock gives you a downward angle that shows more of the wave.
- Distance: Get as close as possible without being in danger. The closer you are, the more detail and less atmospheric haze.
Timing
The best surf photos capture a moment of action:
- The bottom turn — the surfer at the bottom of the wave, turning back up. Spray, speed, compression.
- The drop — the surfer just taking off, riding down the face. Dramatic angle.
- The barrel — if the wave is hollow enough. The surfer framed inside the curl.
- The wipeout — sometimes the most dramatic and memorable shot.
Use burst mode and shoot through the action. Take 20 frames and keep the best 2.
Light
Light makes or breaks surf photography:
- Golden hour (sunrise and sunset): The best light. Warm tones, long shadows, dramatic sky. The spray off the wave lip glows.
- Backlit: Shooting toward the sun (surfer between you and the sun) creates silhouettes and spray that catches the light. Dramatic but hard to expose correctly.
- Midday: Harsh and flat. The worst light for surf photography. If you must shoot midday, look for overcast days — the clouds act as a giant softbox.
Camera settings (manual or semi-auto)
- Shutter speed: 1/1000 or faster to freeze motion. This is the most important setting.
- Aperture: f/5.6–f/8 for sharp subjects with some background blur.
- ISO: As low as possible while maintaining the shutter speed. Auto ISO works well on modern cameras.
- Focus mode: Continuous AF (AF-C or AI Servo). The subject is moving — your focus needs to track.
- Burst rate: Set to high-speed continuous shooting. You'll delete 90% of the frames — that's normal.
Composition tips
- Leave space in front of the surfer. The surfer should be riding into the frame, not out of it. More space ahead, less behind.
- Include the wave. A photo of just the surfer isn't as compelling as the surfer-on-the-wave relationship. Show the wave's power and shape.
- Show the environment. Some of the best surf photos include the landscape — cliffs, palm trees, dramatic skies. Pull back occasionally for context.
- Shoot vertical for social. If the photo is going on Instagram, shoot vertical and horizontal versions. Vertical shows more of the wave face.
Editing
Keep it simple:
- Crop to improve composition (the burst mode frame is rarely perfectly composed)
- Increase contrast slightly — surf photos often look flat due to atmospheric haze
- Adjust white balance — ocean shots can skew blue. Warm them slightly for a more pleasing tone.
- Sharpen carefully. Over-sharpened surf photos look crunchy.
Free editing tools: Lightroom Mobile, Snapseed, VSCO. Any of them are fine.
Protecting your gear
- Salt spray travels further than you think. Wipe down your camera and lens after every beach session with a damp cloth.
- Use a UV or clear filter on your lens — it protects the front element from spray and sand.
- Keep a lens cloth in your pocket. You'll use it constantly.
- Never change lenses on the beach. Sand in the sensor is a nightmare.